
Diffusers documentation
Shap-E
Shap-E
Shap-Eモデルは、OpenAIのAlex Nichol氏とHeewoo Jun氏によって、Shap-E: Generating Conditional 3D Implicit Functionsで提案されました。
論文の抄録は以下の通りです:
本稿では、3Dアセット向けの条件付き生成モデルであるShap-Eを提案します。3D生成モデルに関する最近の研究は単一の出力表現を生成するのに対し、Shap-Eは、テクスチャ付きメッシュとニューラル放射場(NeRF)の両方としてレンダリング可能な暗黙関数のパラメータを直接生成します。Shap-Eの学習は2段階で行われます。まず、3Dアセットを暗黙関数のパラメータへ決定論的にマッピングするエンコーダを学習し、次に、そのエンコーダの出力に対して条件付き拡散モデルを学習します。3Dデータとテキストデータのペアからなる大規模データセットで学習された場合、得られるモデルは数秒で複雑かつ多様な3Dアセットを生成できます。点群に対する明示的な生成モデルであるPoint-Eと比較すると、Shap-Eはより高次元で多表現の出力空間をモデル化しているにもかかわらず、より速く収束し、同等以上のサンプル品質に達します。
元のコードベースはopenai/shap-eで確認できます。
パイプライン間でコンポーネントを再利用するセクションを参照し、同じコンポーネントを複数のパイプラインに効率的に読み込む方法について学習してください。
以下のライブラリがインストールされていることを確認してください。
# uncomment to install the necessary libraries in Colab
#!pip install -q diffusers transformers accelerate trimesh
テキストから3D
3DオブジェクトのGIFを生成するには、テキストプロンプトをShapEPipelineに渡します。このパイプラインは、3Dオブジェクトの作成に使用される画像フレームのリストを生成します。
import torch
from diffusers import ShapEPipeline

device = torch.device("cuda" if torch.cuda.is_available() else "cpu")

pipe = ShapEPipeline.from_pretrained("openai/shap-e", dtype=torch.float16, variant="fp16")
pipe = pipe.to(device)

guidance_scale = 15.0
prompt = ["A firecracker", "A birthday cupcake"]

images = pipe(
    prompt,
    guidance_scale=guidance_scale,
    num_inference_steps=64,
    frame_size=256,
).images次に、export_to_gif() 関数を使用して、画像フレームのリストを3Dオブジェクトのgifに変換します。
from diffusers.utils import export_to_gif

export_to_gif(images[0], "firecracker_3d.gif")
export_to_gif(images[1], "cake_3d.gif")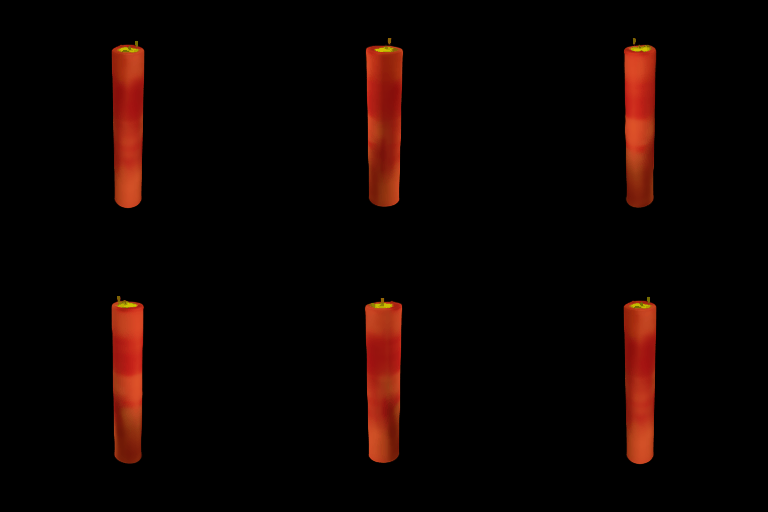

画像から3D
別の画像から3Dオブジェクトを生成するには、ShapEImg2ImgPipelineを使用します。既存の画像を使用することも、まったく新しい画像を生成することもできます。ここでは、Kandinsky 2.1モデルを使用して新しい画像を生成します。
from diffusers import DiffusionPipeline
import torch

prior_pipeline = DiffusionPipeline.from_pretrained("kandinsky-community/kandinsky-2-1-prior", dtype=torch.float16, use_safetensors=True).to("cuda")  # or "mps", "xpu", "cpu"
pipeline = DiffusionPipeline.from_pretrained("kandinsky-community/kandinsky-2-1", dtype=torch.float16, use_safetensors=True).to("cuda")

prompt = "A cheeseburger, white background"

image_embeds, negative_image_embeds = prior_pipeline(prompt, guidance_scale=1.0).to_tuple()
image = pipeline(
    prompt,
    image_embeds=image_embeds,
    negative_image_embeds=negative_image_embeds,
).images[0]

image.save("burger.png")チーズバーガーをShapEImg2ImgPipelineに渡して、その3D表現を生成します。
from PIL import Image
from diffusers import ShapEImg2ImgPipeline
from diffusers.utils import export_to_gif

pipe = ShapEImg2ImgPipeline.from_pretrained("openai/shap-e-img2img", dtype=torch.float16, variant="fp16").to("cuda")  # or "mps", "xpu", "cpu"

guidance_scale = 3.0
image = Image.open("burger.png").resize((256, 256))

images = pipe(
    image,
    guidance_scale=guidance_scale,
    num_inference_steps=64,
    frame_size=256,
).images

gif_path = export_to_gif(images[0], "burger_3d.gif")

メッシュを生成
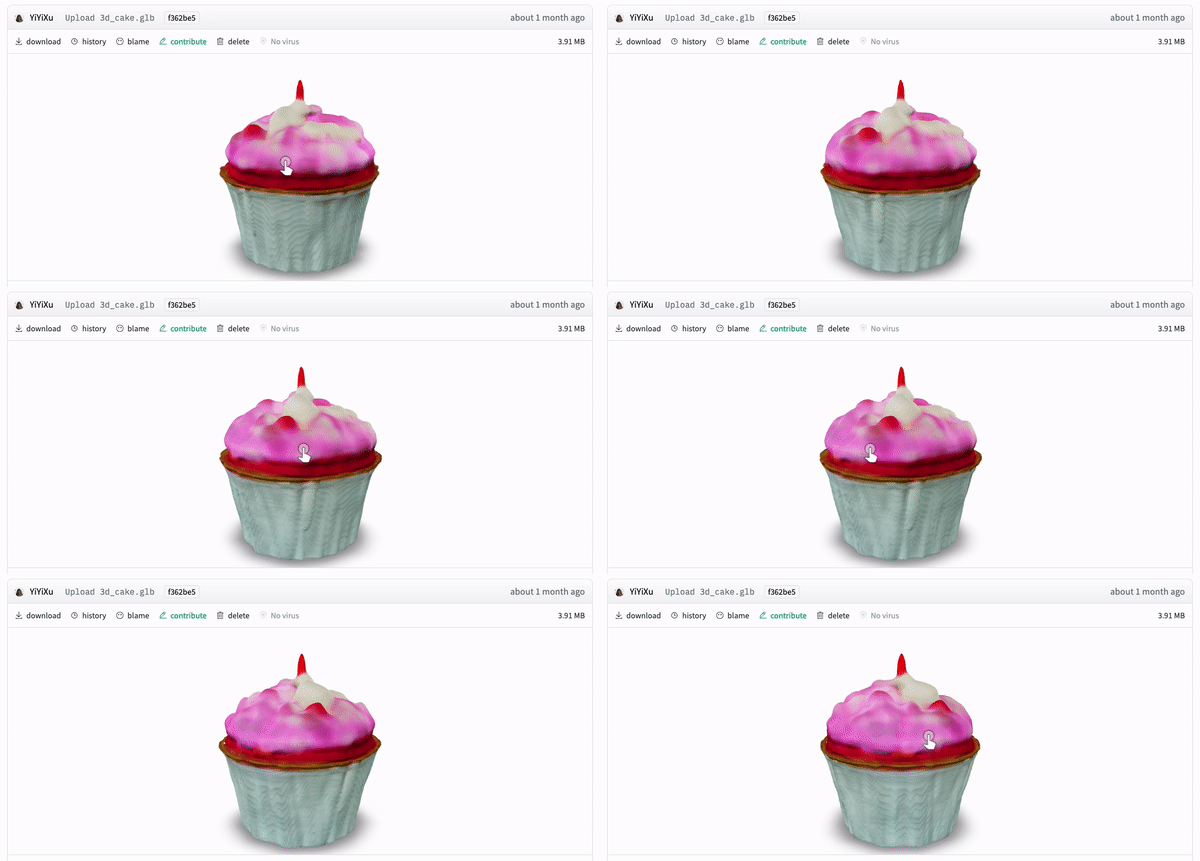
Shap-Eは柔軟なモデルであり、下流アプリケーションでレンダリングするためのテクスチャ付きメッシュ出力を生成することもできます。この例では、🤗 Datasetsライブラリがglbファイルのメッシュ可視化をサポートしており、Dataset viewerでレンダリングできるため、出力をglbファイルに変換します。
output_type パラメータを "mesh" に指定することで、ShapEPipeline と ShapEImg2ImgPipeline の両方でメッシュ出力を生成できます。
import torch
from diffusers import ShapEPipeline

device = torch.device("cuda" if torch.cuda.is_available() else "cpu")

pipe = ShapEPipeline.from_pretrained("openai/shap-e", dtype=torch.float16, variant="fp16")
pipe = pipe.to(device)

guidance_scale = 15.0
prompt = "A birthday cupcake"

images = pipe(prompt, guidance_scale=guidance_scale, num_inference_steps=64, frame_size=256, output_type="mesh").images
export_to_ply() 関数を使用して、メッシュ出力をplyファイルとして保存します:
export_to_obj()関数を使用して、メッシュの出力をobjファイルとして保存することもできます。メッシュの出力をさまざまな形式で保存できるため、下流での利用がより柔軟になります!
from diffusers.utils import export_to_ply

ply_path = export_to_ply(images[0], "3d_cake.ply")
print(f"Saved to folder: {ply_path}")
その後、trimesh ライブラリを使用して、ply ファイルを glb ファイルに変換できます。
import trimesh

mesh = trimesh.load("3d_cake.ply")
mesh_export = mesh.export("3d_cake.glb", file_type="glb")
デフォルトでは、メッシュの出力は下からの視点にフォーカスされていますが、回転変換を適用することでデフォルトの視点を変更できます。
import trimesh
import numpy as np

mesh = trimesh.load("3d_cake.ply")
rot = trimesh.transformations.rotation_matrix(-np.pi / 2, [1, 0, 0])
mesh = mesh.apply_transform(rot)
mesh_export = mesh.export("3d_cake.glb", file_type="glb")
メッシュファイルをデータセットリポジトリにアップロードして、Dataset viewer で可視化しましょう!
ShapEPipeline
class diffusers.ShapEPipeline
< source >( prior: PriorTransformertext_encoder: CLIPTextModelWithProjectiontokenizer: CLIPTokenizerscheduler: HeunDiscreteSchedulershap_e_renderer: ShapERenderer )
パラメータ
- prior (PriorTransformer) — テキスト埋め込みから画像埋め込みを近似するための、正規の unCLIP 事前分布モデル。
- text_encoder (CLIPTextModelWithProjection) — 凍結されたテキストエンコーダーです。
- tokenizer (CLIPTokenizer) —
テキストをトークン化するための
CLIPTokenizer。 - scheduler (HeunDiscreteScheduler) —
priorモデルと組み合わせて画像埋め込みを生成するために使用するスケジューラ。 - shap_e_renderer (
ShapERenderer) — Shap-E レンダラーは、生成された潜在変数を MLP のパラメータに射影し、NeRF レンダリング手法を用いて 3D オブジェクトを作成します。
3Dアセットの潜在表現を生成し、NeRF手法でレンダリングするためのPipeline。
このモデルは DiffusionPipeline を継承しています。すべてのパイプラインに実装されている汎用的なメソッド(ダウンロード、保存、特定のデバイスでの実行など)については、スーパークラスのドキュメントを参照してください。
__call__
< source >( prompt: strnum_images_per_prompt: int = 1num_inference_steps: int = 25generator: typing.Union[torch.Generator, list[torch.Generator], NoneType] = Nonelatents: typing.Optional[torch.Tensor] = Noneguidance_scale: float = 4.0frame_size: int = 64output_type: str | None = 'pil'return_dict: bool = True ) → ShapEPipelineOutput or tuple
パラメータ
- prompt (
strまたはlist[str]) — 画像生成をガイドするためのプロンプト、またはプロンプトのリスト。 - num_images_per_prompt (
int、任意、デフォルトは 1) — プロンプトごとに生成する画像の数。 - num_inference_steps (
int、任意、デフォルト値は 25)— デノイジングのステップ数です。デノイジングのステップ数を増やすと、推論速度が遅くなる代わりに、通常はより高品質な画像が得られます。 - generator (
torch.Generatorまたはlist[torch.Generator]、省略可) — 生成を決定論的にするためのtorch.Generator。 - latents (
torch.Tensor, 任意) — ガウス分布からサンプリングされた事前生成されたノイズ付き latents。画像生成のインプットとして使用します。異なるプロンプトで同じ生成を調整するために使用できます。指定されない場合、指定されたランダムgeneratorを用いてサンプリングを行い、latents テンソルが生成されます。 - guidance_scale (
float、任意、デフォルト値は 4.0) — guidance scale の値を高くすると、画像の品質が低下する代わりに、promptと密接に関連した画像を生成するようモデルが促されます。guidance_scale > 1の場合、guidance scale が有効になります。 - frame_size (
int、任意、デフォルトは 64) — 生成される 3D 出力の各画像フレームの幅と高さです。 - output_type (
str、任意、デフォルトは"pil") — 生成画像の出力形式です。"pil"(PIL.Image.Image)、"np"(np.array)、"latent"(torch.Tensor)、またはメッシュ (MeshDecoderOutput) から選択してください。 - return_dict (
bool、省略可能、デフォルトはTrue) — プレーンなタプルではなく ShapEPipelineOutput を返すかどうか。
戻り値
ShapEPipelineOutput または tuple
return_dict が True の場合、ShapEPipelineOutput が返され、それ以外の場合は、最初の要素が生成された画像のリストである tuple が返されます。
生成用の pipeline への呼び出し関数。
例:
>>> import torch
>>> from diffusers import DiffusionPipeline
>>> from diffusers.utils import export_to_gif

>>> device = torch.device("cuda" if torch.cuda.is_available() else "cpu")

>>> repo = "openai/shap-e"
>>> pipe = DiffusionPipeline.from_pretrained(repo, torch_dtype=torch.float16)
>>> pipe = pipe.to(device)

>>> guidance_scale = 15.0
>>> prompt = "a shark"

>>> images = pipe(
...     prompt,
...     guidance_scale=guidance_scale,
...     num_inference_steps=64,
...     frame_size=256,
... ).images

>>> gif_path = export_to_gif(images[0], "shark_3d.gif")
ShapEImg2ImgPipeline
class diffusers.ShapEImg2ImgPipeline
< source >( prior: PriorTransformerimage_encoder: CLIPVisionModelimage_processor: CLIPImageProcessorPilscheduler: HeunDiscreteSchedulershap_e_renderer: ShapERenderer )
パラメータ
- prior (PriorTransformer) — テキスト埋め込みから画像埋め込みを近似するための、正規の unCLIP 事前分布モデル。
- image_encoder (CLIPVisionModel) — 凍結された画像エンコーダー。
- image_processor (CLIPImageProcessor) —
画像を処理するための
CLIPImageProcessor。 - scheduler (HeunDiscreteScheduler) —
priorモデルと組み合わせて画像埋め込みを生成するために使用するスケジューラ。 - shap_e_renderer (
ShapERenderer) — Shap-E レンダラーは、生成された潜在変数を MLP のパラメータに射影し、NeRF レンダリング手法を用いて 3D オブジェクトを作成します。
画像から3Dアセットの潜在表現を生成し、NeRF手法でレンダリングするためのPipeline。
このモデルは DiffusionPipeline を継承しています。すべてのパイプラインに実装されている汎用的なメソッド(ダウンロード、保存、特定のデバイスでの実行など)については、スーパークラスのドキュメントを参照してください。
__call__
< source >( image: PIL.Image.Image | list[PIL.Image.Image]num_images_per_prompt: int = 1num_inference_steps: int = 25generator: typing.Union[torch.Generator, list[torch.Generator], NoneType] = Nonelatents: typing.Optional[torch.Tensor] = Noneguidance_scale: float = 4.0frame_size: int = 64output_type: str | None = 'pil'return_dict: bool = True ) → ShapEPipelineOutput or tuple
パラメータ
- image (
torch.Tensor、PIL.Image.Image、np.ndarray、list[torch.Tensor]、list[PIL.Image.Image]、またはlist[np.ndarray]) —Imageまたは、開始点として使用する画像バッチを表すテンソル。画像の潜在変数(latents)をImageとして渡すこともできますが、潜在変数を直接渡す場合は再度エンコードされません。 - num_images_per_prompt (
int、任意、デフォルトは 1) — プロンプトごとに生成する画像の数。 - num_inference_steps (
int、任意、デフォルト値は 25)— デノイジングのステップ数です。デノイジングのステップ数を増やすと、推論速度が遅くなる代わりに、通常はより高品質な画像が得られます。 - generator (
torch.Generatorまたはlist[torch.Generator]、省略可) — 生成を決定論的にするためのtorch.Generator。 - latents (
torch.Tensor, 任意) — ガウス分布からサンプリングされた事前生成されたノイズ付き latents。画像生成のインプットとして使用します。異なるプロンプトで同じ生成を調整するために使用できます。指定されない場合、指定されたランダムgeneratorを用いてサンプリングを行い、latents テンソルが生成されます。 - guidance_scale (
float、任意、デフォルト値は 4.0) — guidance scale の値を高くすると、画像の品質が低下する代わりに、promptと密接に関連した画像を生成するようモデルが促されます。guidance_scale > 1の場合、guidance scale が有効になります。 - frame_size (
int、任意、デフォルトは 64) — 生成される 3D 出力の各画像フレームの幅と高さです。 - output_type (
str, 任意, デフォルトは"pil") — 生成された画像の出力形式です。"pil"(PIL.Image.Image)、"np"(np.array)、"latent"(torch.Tensor)、またはメッシュ (MeshDecoderOutput) から選択します。 - return_dict (
bool、任意、デフォルトはTrue) — プレーンなタプルではなく ShapEPipelineOutput を返すかどうか。
戻り値
ShapEPipelineOutput または tuple
return_dict が True の場合、ShapEPipelineOutput が返され、それ以外の場合は、最初の要素が生成された画像のリストである tuple が返されます。
生成用の pipeline への呼び出し関数。
例:
>>> from PIL import Image
>>> import torch
>>> from diffusers import DiffusionPipeline
>>> from diffusers.utils import export_to_gif, load_image

>>> device = torch.device("cuda" if torch.cuda.is_available() else "cpu")

>>> repo = "openai/shap-e-img2img"
>>> pipe = DiffusionPipeline.from_pretrained(repo, torch_dtype=torch.float16)
>>> pipe = pipe.to(device)

>>> guidance_scale = 3.0
>>> image_url = "https://hf.co/datasets/diffusers/docs-images/resolve/main/shap-e/corgi.png"
>>> image = load_image(image_url).convert("RGB")

>>> images = pipe(
...     image,
...     guidance_scale=guidance_scale,
...     num_inference_steps=64,
...     frame_size=256,
... ).images

>>> gif_path = export_to_gif(images[0], "corgi_3d.gif")
ShapEPipelineOutput
class diffusers.pipelines.shap_e.pipeline_shap_e.ShapEPipelineOutput
< source >( images: list[list[PIL.Image.Image]] | list[list[numpy.ndarray]] )
ShapEPipelineおよびShapEImg2ImgPipelineの出力クラスです。